Most of us can find 10 minutes a day in a quiet place to practice a few yoga exercises. In fact, even 10 minutes a day can help you reap the benefits of yoga, including increased strength and flexibility, more energy, improved respiration, enhanced cardiovascular and circulatory health, improved sports performance, injury prevention and lower stress levels.
Of course, you can always progress to include more and different poses in your practice, but start by doing these simple and essential poses, and then add to your routine in good time. 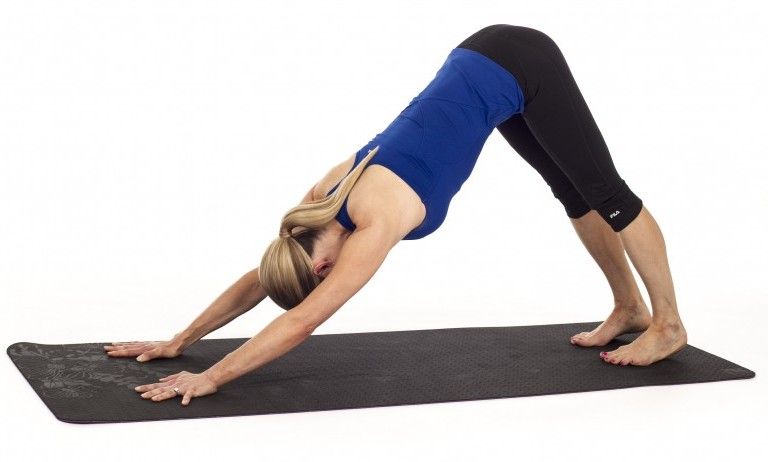
1. Downward-Facing Dog (Adho Mukha Svanasana)
A foundational pose in many styles of yoga, down dog is the whole package. It helps strengthen the shoulders, arms and legs; it lengthens out the spine and helps relieve pain in the upper, middle and low back. It’s also a gentle inversion, which reverses the flow of blood in the body, benefiting the circulatory and lymphatic systems and fighting the effects of gravity on the body.
HOW TO DO IT: Starting from a tabletop position with your shoulders directly over your wrists and your hips over your knees, curl your toes under and lift your hips skyward. Keep your spine flat and extend the backs of the legs only as far as the hamstrings allow. Spread your fingers wide and gaze at your feet.
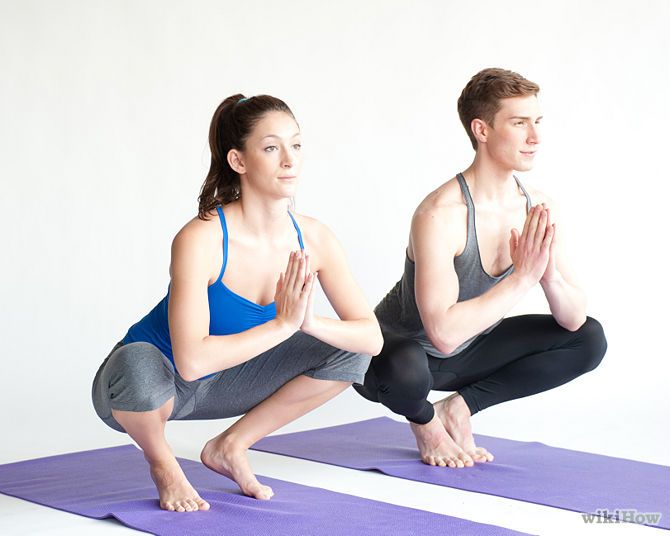
2. Garland Pose (Malasana)
The garland pose helps open the hips and inner thighs and lengthen out the spine. It helps you keep your pelvic and hip joints healthy.
HOW TO DO IT: Start with your feet wider than hip-width apart and turn your toes out slightly. Keep your gaze forward and your spine straight as you push your hips back and lower down as if into a chair. The goal is to bring the hips as low as you can without rounding the spine. If you can’t lower down without your heels lifting off the mat, roll up a towel or blanket and place it beneath the heels. Bring your hands to prayer position at mid-chest and push into the inner knees with your elbows, further opening your hips.
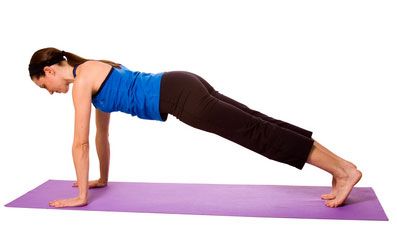
3. Plank Pose
Plank pose is one of the best ways to build core strength as well as strength and stability in the wrists, arms, shoulders and quadriceps.
HOW TO DO IT: Start in downward dog. Roll forward onto the balls of your feet and lower your hips so that your shoulders come directly over your wrists and your hips are in line with the top of your head and shoulders. Keep your abdominal muscles contracted and your leg muscles engaged. Beginners can modify the pose by lowering their knees to the ground while keeping a straight, solid line through the knees, hips and head.
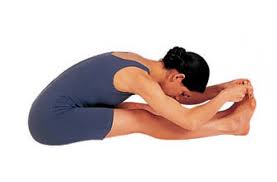
4. Forward Bend (Uttanasana)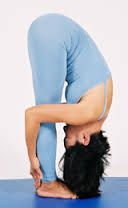
Forward bends are a great counter to hunching over computers all day. They’re great for when you don’t have a mat or a lot of space. Calming to the nervous system, forward bends also stretch out the spine, glutes and hamstrings and strengthen the quadriceps and knees.
HOW TO DO IT: Stand with your feet hip-distance apart. Fold forward at the hips, only going as far as your hamstrings allow. Keep your knees bent just a little and rest your stomach on your thighs. Advanced practitioners can straighten the legs. Chanlett-Avery recommends clasping the hands behind the back and bringing them overhead to increase mobility in the shoulders.
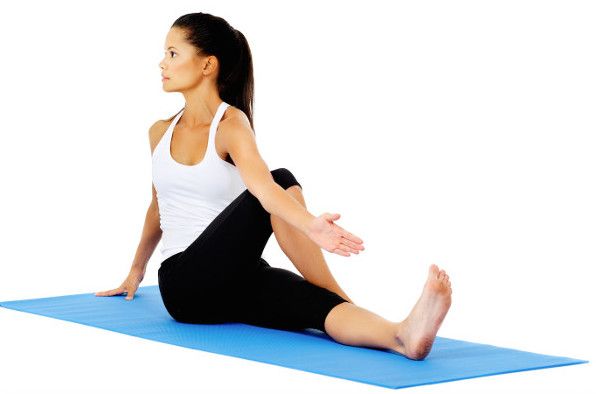
5. Seated Spinal Twist (Marichi’s Pose)
Twists are an excellent way to rejuvenate your body and realign your spine, especially when you’ve been sitting in front of your computer all day. In a seated twist, your hips are anchored, so you have less chance of rotation in the hips. That keeps the twist in the thoracic spine and above for the greatest benefit.
HOW TO DO IT: Sit on your mat with your legs extended in front of you. Bend your right knee and place your right foot on the mat about a few inches from your left leg on the outside of your left knee. Bring your right palm to the mat just behind your right glute. Hug your right knee with your right arm or place your left elbow outside of your right knee. With each inhale, lengthen the crown of your head toward the ceiling; with each exhale twist a little deeper. Then switch sides.
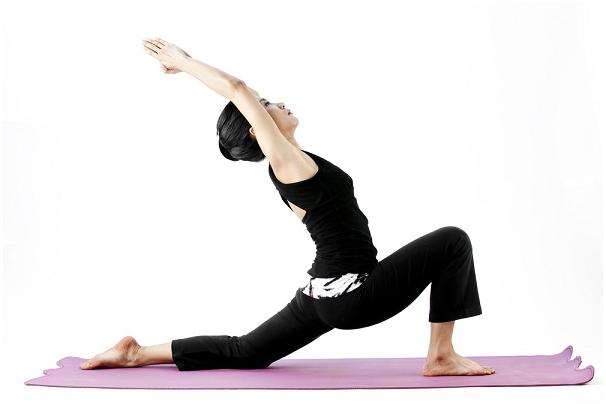
6. Crescent Lunge (Anjaneyasana)
Lunges stretch the hip flexors on the front of the upper thigh and pelvis as well as strengthen the legs and back muscles. Reaching your arms up overhead adds a level of challenge and builds shoulder strength.
HOW TO DO IT: From downward dog, step the right foot forward in between your hands. Make sure your right knee is directly over your right ankle to protect the knee joint. Come onto the ball of the back foot and bring your left hip forward so both hips are in line. On an inhale, raise your torso up and extend your arms to the ceiling, palms rotating in to face each other. If this is too challenging, drop your right knee to the floor. Follow with the same stretch on the other side.
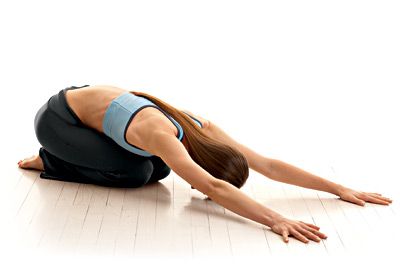
7. Child’s Pose (Balasana)
Child’s pose is a go-to posture for resting, restoring and relieving the body of stress, both physical and mental. It also stretches the hips, knees, ankles, thighs and lower back and relaxes the spine, shoulders and neck.
HOW TO DO IT: Begin kneeling on your yoga mat. Keep your knees touching or open them a little wider than your hips.
“Keeping the knees together provides more support and is recommended for people with less flexibility,”
Lower your butt onto your heels and your torso down toward the floor, resting your forehead on the mat. Extend your arms in front of you, palms facing up to intensify the stretch, or extend your arms behind you with your palms resting faceup next to your hips. For beginners who lack flexibility in the knees and hips, Sharp recommends placing a yoga block under the hips.
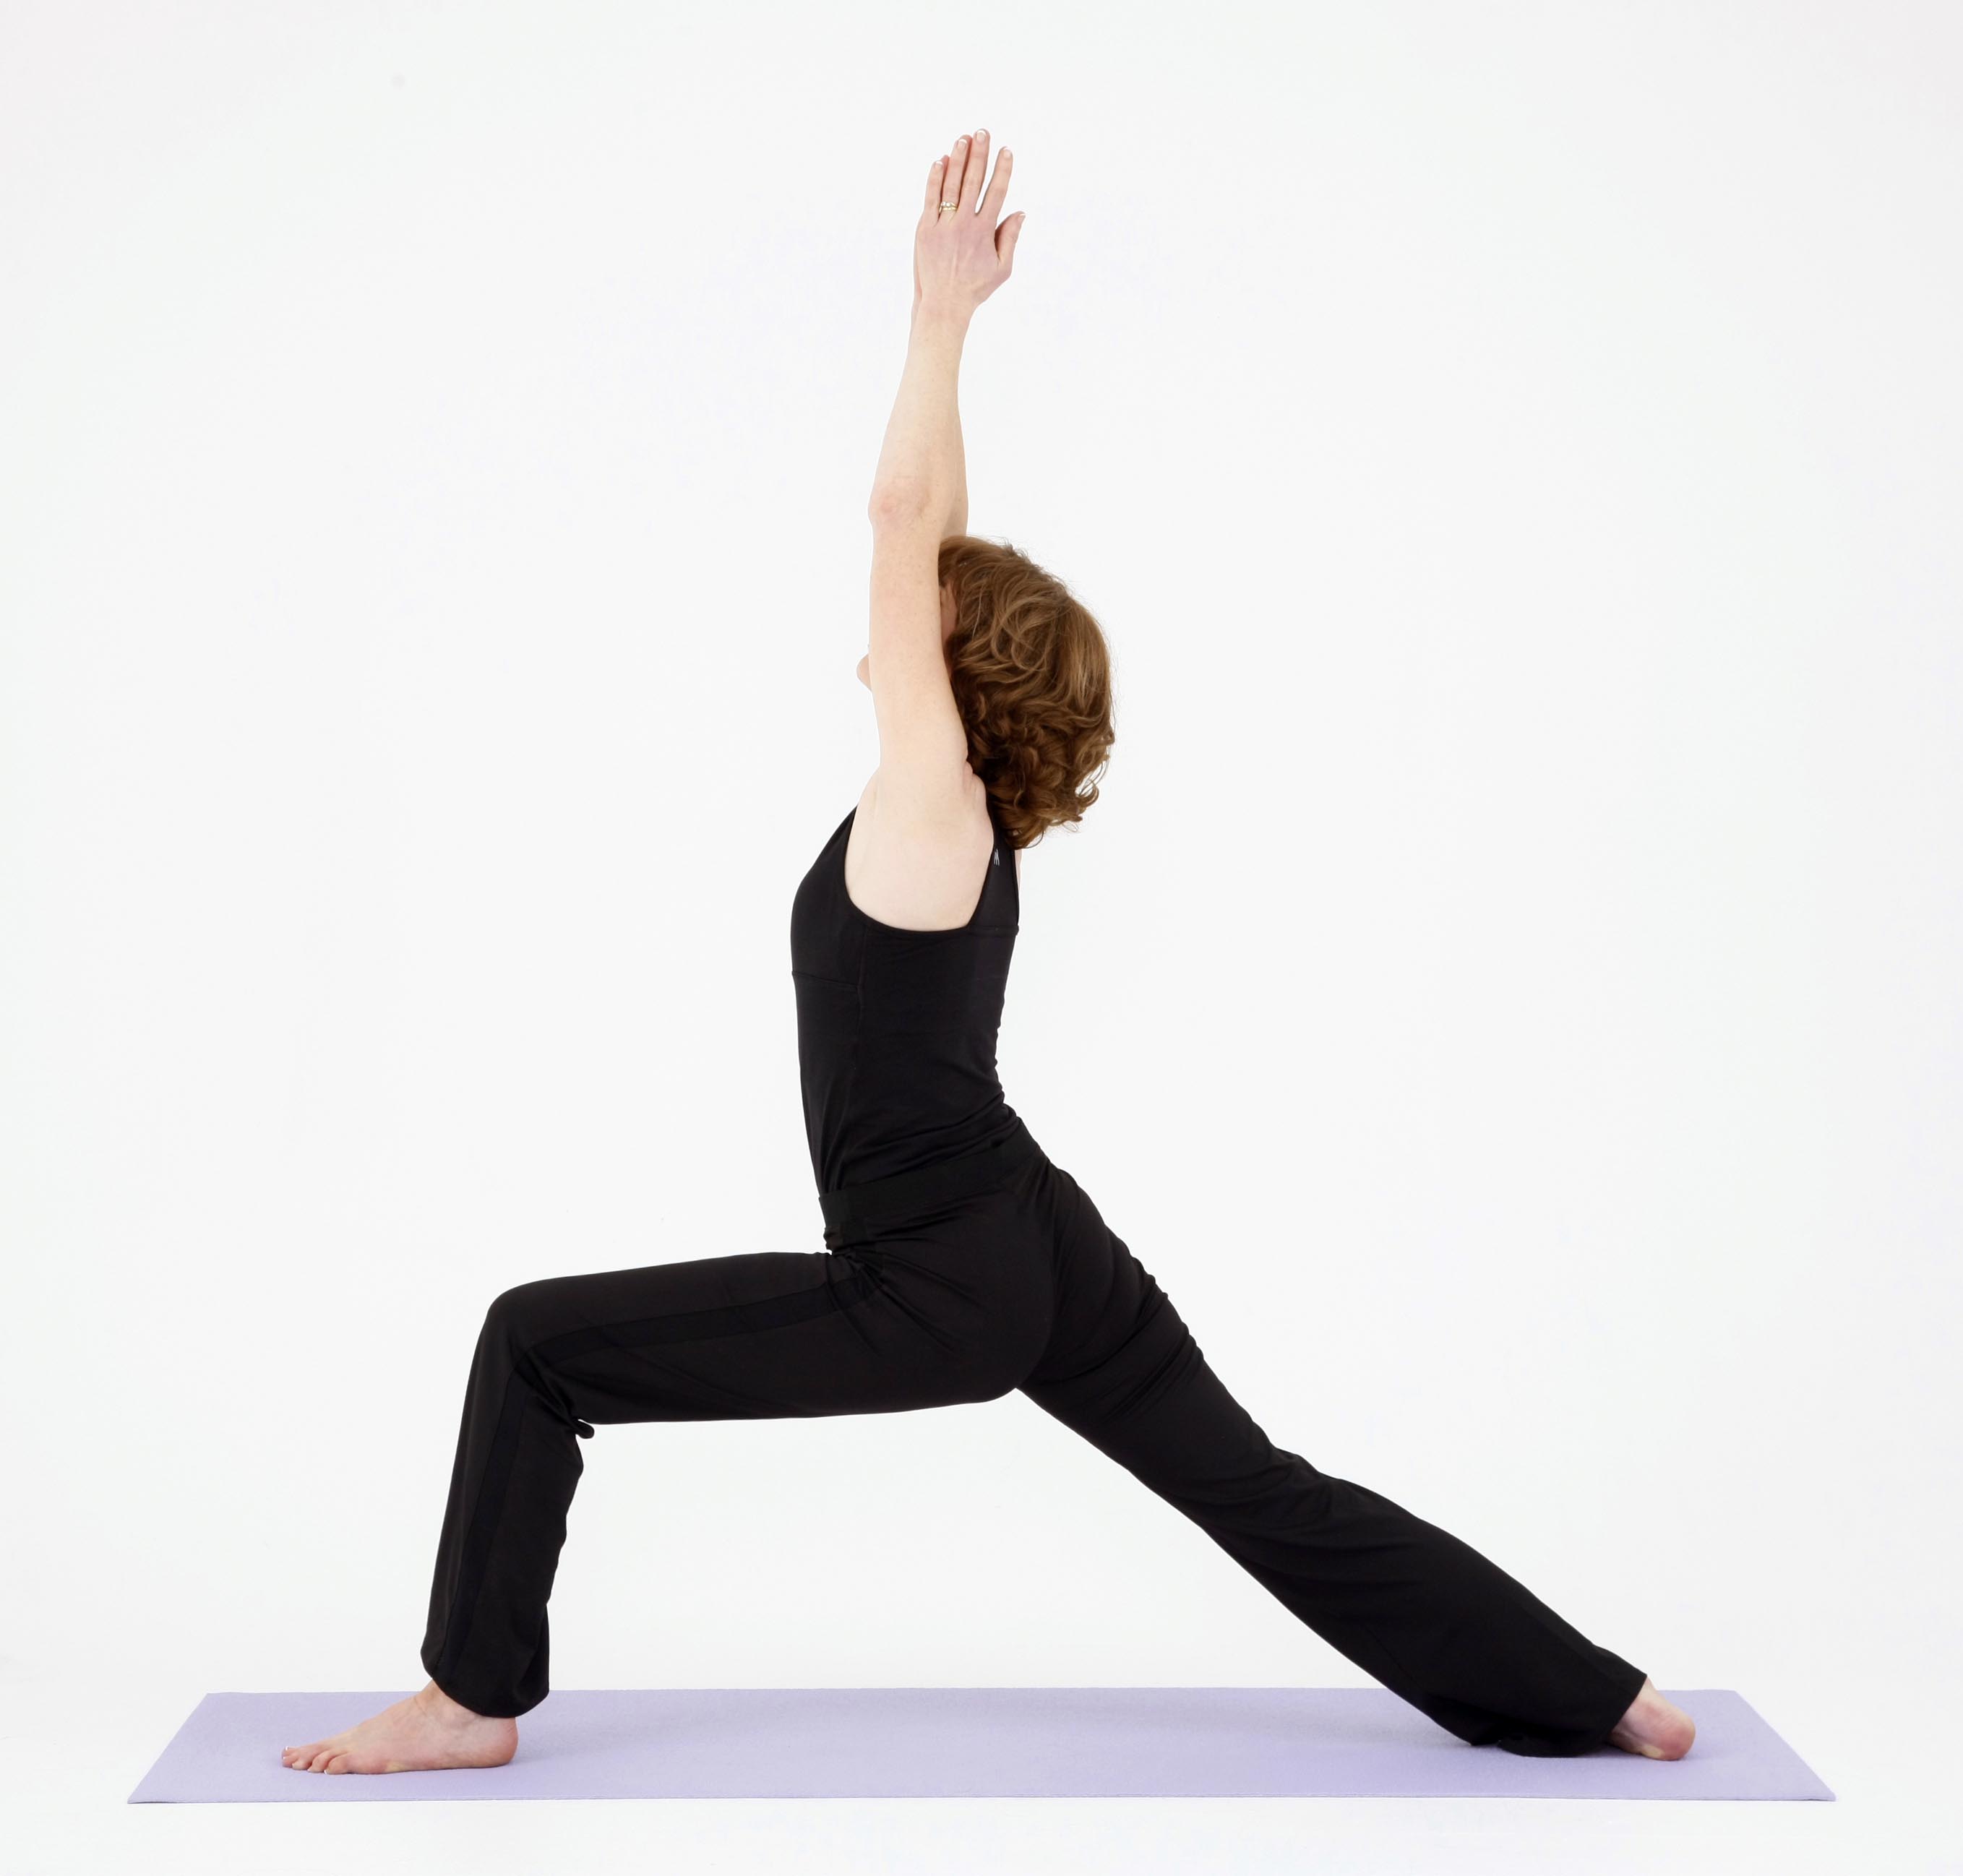
8. Warrior I (Virabhadrasana I)
Warrior I is a dynamic pose because it combines strength flexibility and stability. It helps create better balance, and as the chest and hips rotate forward. The psoas is the main hip flexor muscle that becomes tightened in many people from long periods of sitting.
HOW TO DO IT: From down dog, step your right foot in between your hands. Plant your back foot flat on your mat at a 45-degree angle, and ensure your right knee is centered over your right foot. Inhale as you rise up, bringing your arms overhead, palms touching or facing each other. Then work to rotate your left hip forward, squaring your hips toward the wall in front of you. Finally, sink a little deeper with the front leg, then switch sides.
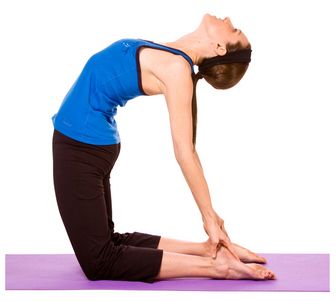
9. Camel Pose (Ustrasana)
Camel pose provides an intense stretch for the front side of the body while strengthening the backside. Back bending is an essential part of any yoga sequence because it counteracts the effects of spending so much time sitting with your hips and knees at 90-degree angles. It can be a very challenging posture, so ease into it slowly and carefully.
HOW TO DO IT: Kneel on a yoga mat with your knees and feet about hip-distance apart. Place your palms on your lower back, fingers pointing down. Draw your elbows together behind you. Inhale and lengthen up toward the ceiling, then exhale as you arch back, allowing your head to fall back with control as well. Stay here or intensify the stretch by reaching your hands for your heels, maintaining the arch in your back as you push your hips forward.
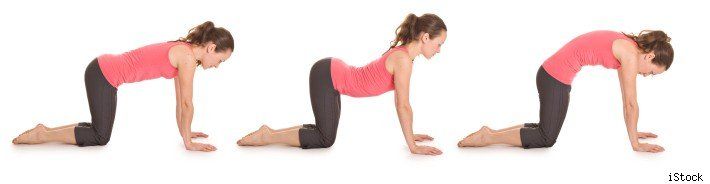
10. Cat-Cow Pose
Back pain affects almost everyone at some point, and a lack of activity can worsen the condition. Cat-cow pose is a combination of two poses performed in a flowing sequence. It loosens up the back muscles, hips and abdominals and strengthens the back and neck to improve posture and balance. It’s also a very relaxing pose, helping to relieve the day’s stresses.
HOW TO DO IT: Start on all fours with your shoulders directly over your wrists, your hips directly over your knees and a neutral spine. Slowly arch your spine so that your belly lowers down toward the floor and your tailbone, shoulders and the crown of your head lift up, creating a hammock shape with your spine. Look up slightly, getting a gentle stretch in your neck. Come back to a neutral spine, and then round your back, tucking your chin and reaching your mid-back up toward the ceiling. Repeat several times, making smooth transitions and aligning your breath with your movement.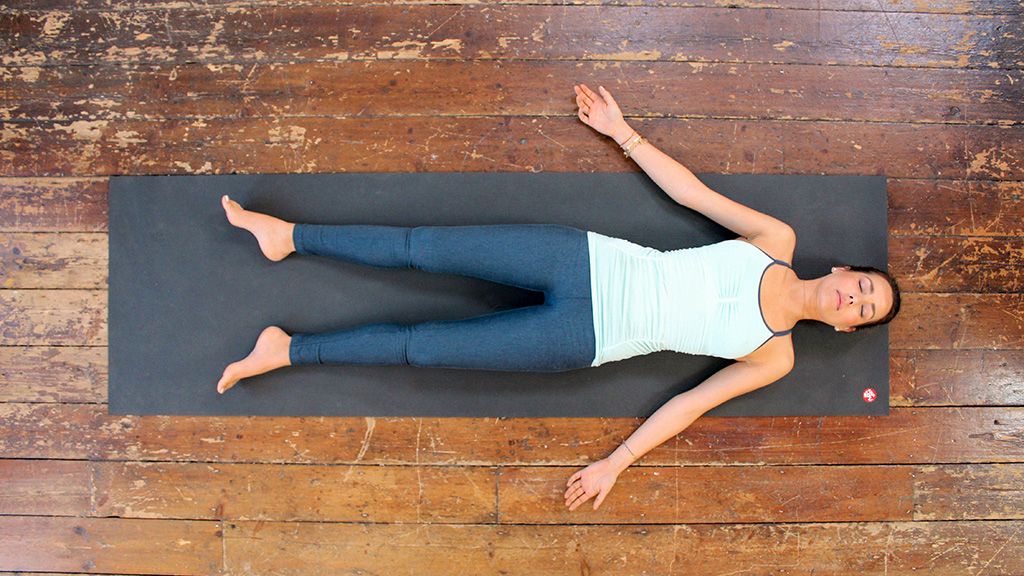
11. Corpse Pose (Savasana)
The hardest, easiest and surprisingly the most important yoga pose. Even advanced practitioners who can contort and invert their bodies in numerous ways can find the practice of just being still challenging. But it’s essential to finish your practice with five to 10 minutes of deep relaxation. During this time, your body begins to really reap the benefits of your practice, your mind becomes quiet and you can transition from your practice to the rest of your day feeling more refreshed.
HOW TO DO IT: Lie on your back, extending your arms and legs out from the mid-line of your body. Open your palms to the ceiling and close your eyes. Breathe normally, be still and let go completely of anything you’re holding on to, including muscles and thoughts.
One comment
Pingback: Workout Ideas With Your Partner | Trainer